카메라
게임에서 가장 중요한 요소라고 할 수 있다.
이전 포스팅에는 카메라가 없으니 view와 projection을 비워뒀는데 이제 카메라를 만들어서 카메라가 찍는 영역을 추출해서 화면에 보여주는 걸 만들어보자.
#pragma once
#include "Component.h"

enum class ProjectionType
{
	Perspective, // 원근 투영
	Orthographic, // 직교 투영
};

class Camera :  public Component
{
	using Super = Component;
public:
	Camera();
	virtual ~Camera();

	virtual void Update() override;

	void UpdateMatrix();

	void SetNear(float value) { _near = value; }
	void SetFar(float value) { _far = value; }
	void SetFOV(float value) { _fov = value; }
	void SetWidth(float value) { _width = value; }
	void SetHeight(float value) { _height = value; }

	Matrix& GetViewMatrix() { return _matView; }
	Matrix& GetProjectionMatrix() { return _matProjection; }

private:
	Matrix _matView = Matrix::Identity;
	Matrix _matProjection = Matrix::Identity;

	float _near = 1.f;
	float _far = 1000.f;
	float _fov = XM_PI / 4.f;
	float _width = 0.f;
	float _height = 0.f;

public:
	static Matrix S_MatView;
	static Matrix S_MatProjection;
};#include "pch.h"
#include "Camera.h"
Matrix Camera::S_MatView = Matrix::Identity;
Matrix Camera::S_MatProjection = Matrix::Identity;
Camera::Camera() : Super(ComponentType::Camera)
{
_width = static_cast<float>(GAME->GetGameDesc().width);
_height = static_cast<float>(GAME->GetGameDesc().height);
}
Camera::~Camera()
{
}
void Camera::Update()
{
UpdateMatrix();
}
void Camera::UpdateMatrix()
{
Vec3 eyePosition = GetTransform()->GetPosition();
Vec3 focusPosition = eyePosition + GetTransform()->GetLook();
Vec3 upDirection = GetTransform()->GetUp();
S_MatView = ::XMMatrixLookAtLH(eyePosition, focusPosition, upDirection);
//S_MatView = GetTransform()->GetWorldMatrix().Invert();
S_MatProjection = ::XMMatrixPerspectiveFovLH(_fov, _width / _height, _near, _far);
}이제 그러면 어떤 텍스처를 입힌 오브젝트를 카메라에 보이게 해서 화면에 띄우는 실습을 해보자.
카메라가 이동하는 스크립트를 만들어보면 이렇게 Update에서 이동에 대한 처리를 한후 적용하게 된다.
#include "pch.h"
#include "CameraScript.h"
#include "Transform.h"

void CameraScript::Update()
{
	float dt = TIME->GetDeltaTime();

	Vec3 pos = GetTransform()->GetPosition();

	if (INPUT->GetButton(KEY_TYPE::W))
		pos += GetTransform()->GetLook() * _speed * dt;
	if (INPUT->GetButton(KEY_TYPE::S))
		pos -= GetTransform()->GetLook() * _speed * dt;
	if (INPUT->GetButton(KEY_TYPE::A))
		pos -= GetTransform()->GetRight() * _speed * dt;
	if (INPUT->GetButton(KEY_TYPE::D))
		pos += GetTransform()->GetRight() * _speed * dt;

	GetTransform()->SetPosition(pos);

	if (INPUT->GetButton(KEY_TYPE::Q))
	{
		Vec3 rotation = GetTransform()->GetLocalRotation();
		rotation.x += dt * 0.5f;
		GetTransform()->SetLocalRotation(rotation);
	}
	if (INPUT->GetButton(KEY_TYPE::E))
	{
		Vec3 rotation = GetTransform()->GetLocalRotation();
		rotation.x -= dt * 0.5f;
		GetTransform()->SetLocalRotation(rotation);
	}
	if (INPUT->GetButton(KEY_TYPE::Z))
	{
		Vec3 rotation = GetTransform()->GetLocalRotation();
		rotation.y += dt * 0.5f;
		GetTransform()->SetLocalRotation(rotation);
	}
	if (INPUT->GetButton(KEY_TYPE::C))
	{
		Vec3 rotation = GetTransform()->GetLocalRotation();
		rotation.y -= dt * 0.5f;
		GetTransform()->SetLocalRotation(rotation);
	}
}

void CameraScript::Start()
{
}#include "pch.h"
#include "04. CameraDemo.h"
#include "GeometryHelper.h"
#include "Camera.h"
#include "CameraScript.h"
#include "GameObject.h"
void CameraDemo::Init()
{
DC->IASetPrimitiveTopology(D3D11_PRIMITIVE_TOPOLOGY_TRIANGLELIST);
_shader = make_shared<Shader>(L"04. World.fx");
_geometry = make_shared<Geometry<VertexColorData>>();
GeometryHelper::CreateQuad(_geometry, Color(0.f, 1.f, 0.f, 1.f));
_vertexBuffer = make_shared<VertexBuffer>();
_vertexBuffer->Create(_geometry->GetVertices());
_indexBuffer = make_shared<IndexBuffer>();
_indexBuffer->Create(_geometry->GetIndices());
_camera = make_shared<GameObject>();
_camera->GetOrAddTransform();
_camera->AddComponent(make_shared<Camera>());
_camera->AddComponent(make_shared<CameraScript>());
}
void CameraDemo::Update()
{
_camera->Update();
}
void CameraDemo::Render()
{
_shader->GetMatrix("World")->SetMatrix((float*)&_world);
_shader->GetMatrix("View")->SetMatrix((float*)&Camera::S_MatView);
_shader->GetMatrix("Projection")->SetMatrix((float*)&Camera::S_MatProjection);
uint32 stride = _vertexBuffer->GetStride();
uint32 offset = _vertexBuffer->GetOffset();
DC->IASetVertexBuffers(0, 1, _vertexBuffer->GetComPtr().GetAddressOf(), &stride, &offset);
DC->IASetIndexBuffer(_indexBuffer->GetComPtr().Get(), DXGI_FORMAT_R32_UINT, 0);
_shader->DrawIndexed(0, 0, _indexBuffer->GetCount(), 0, 0);
}이렇게 하면 맨 처음 실행했을 때 아무 화면도 보이지 않을 것이다.
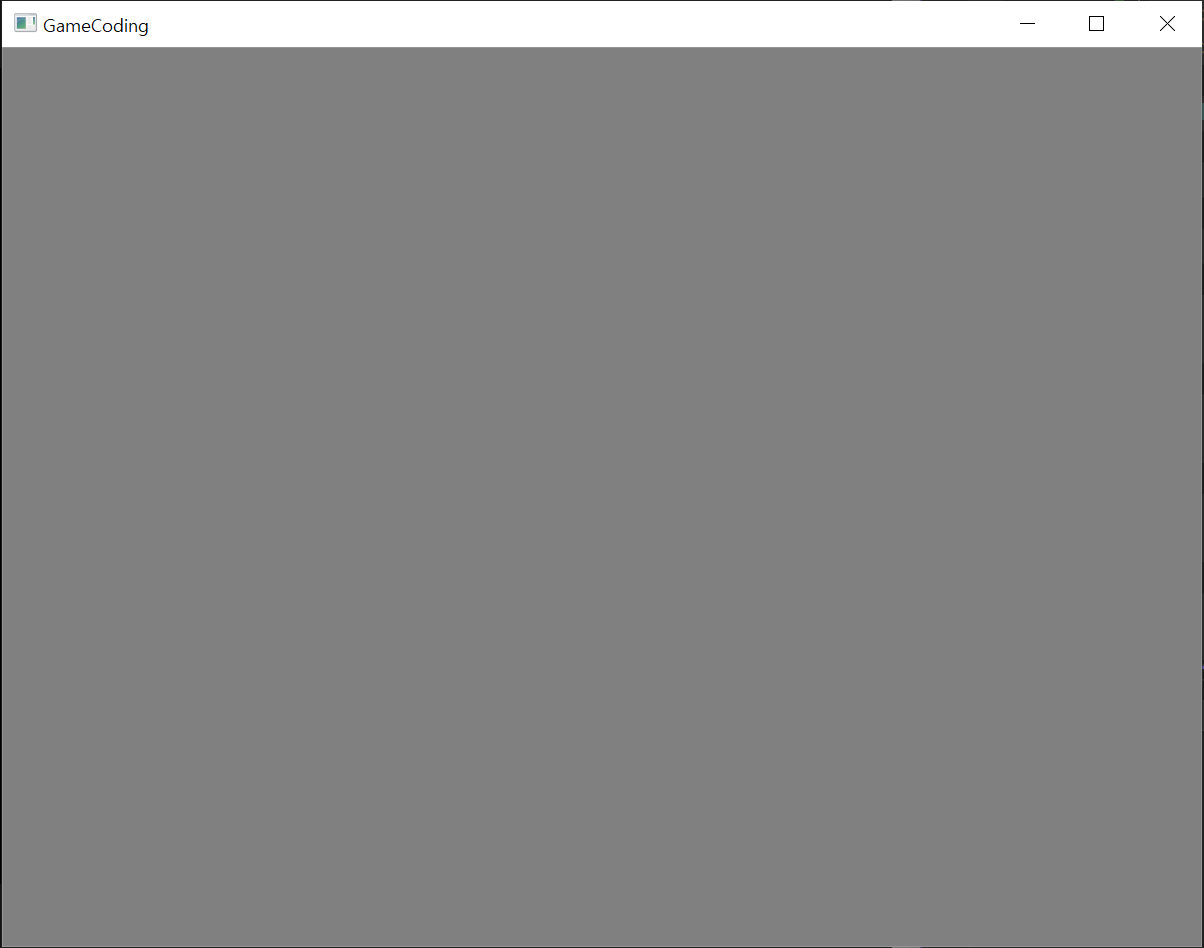
이는 카메라의 좌표가 현재 0,0,0 이고 오브젝트의 위치도 0,0,0 이기 때문에 위치가 동일해서 카메라에 보이지 않기 때문에 그려지지 않는 것이다. 이 상태에서 s 를 눌러 z축을 기준으로 뒤로 가게 되면 이렇게 보인다.

텍스처
GeometryHelper에서 제공되는 것들을 늘려보자. 다양한 모형을 제공하는것을 목적으로 한다. 사각형 + 큐브 + 구 + 그리드 + 실린더 등등 을 만들어보자. 이는 밑에서 만들어 보도록 하고 일단 텍스처를 업로드 하는 방법을 알아보자.
class GeometryHelper
{
public:
	static void CreateQuad(shared_ptr<Geometry<VertexColorData>> geometry, Color color);

	static void CreateQuad(shared_ptr<Geometry<VertexTextureData>> geometry);
	static void CreateCube(shared_ptr<Geometry<VertexTextureData>> geometry);
	static void CreateSphere(shared_ptr<Geometry<VertexTextureData>> geometry);
	static void CreateGrid(shared_ptr<Geometry<VertexTextureData>> geometry);
};_texture = RESOURCES->Load<Texture>(L"Veigar", L"..\\Resources\\Textures\\veigar.jpg");이렇게 원하는 경로의 텍스처를 업로드 할 수 있고 이를 SRV를 통해 적용할 수 있다.
_shader->GetSRV("Texture0")->SetResource(_texture->GetComPtr().Get());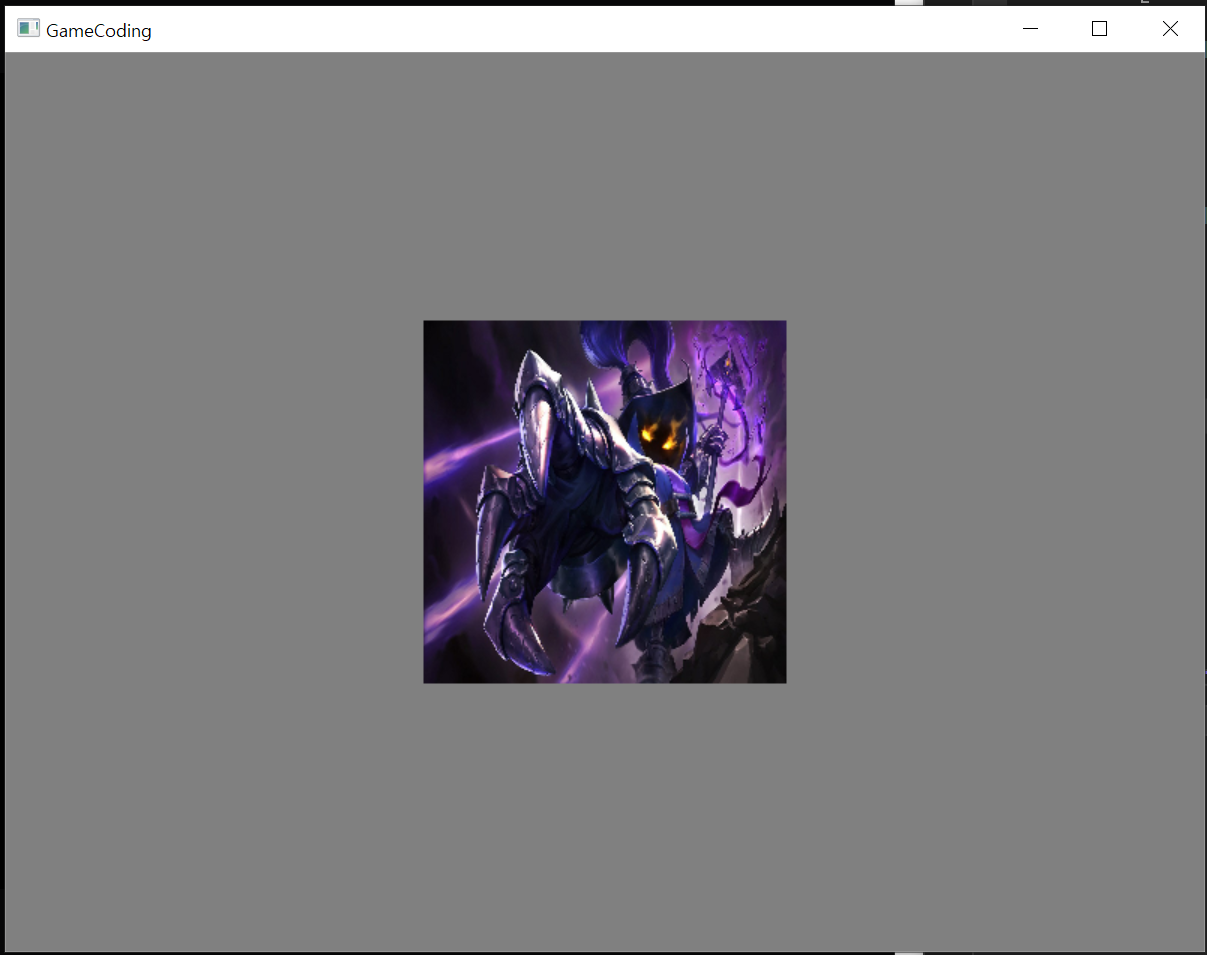
Geometry
Qube 를 구성하는 vertex의 개수는 몇개가 필요할까. 8개가 필요하다고 생각할 수 있다. 하지만 uv 좌표를 매핑해주기 위해서는 결국 사각형 6개를 합친거라고 볼 수 있다. 즉 정점이 24개가 필요하다는 것이다.
void GeometryHelper::CreateCube(shared_ptr<Geometry<VertexTextureData>> geometry)
{
	float w2 = 0.5f;
	float h2 = 0.5f;
	float d2 = 0.5f;

	vector<VertexTextureData> vtx(24);

	// 앞면
	vtx[0] = VertexTextureData{ Vec3(-w2, -h2, -d2), Vec2(0.0f, 1.0f) };
	vtx[1] = VertexTextureData{ Vec3(-w2, +h2, -d2), Vec2(0.0f, 0.0f) };
	vtx[2] = VertexTextureData{ Vec3(+w2, +h2, -d2), Vec2(1.0f, 0.0f) };
	vtx[3] = VertexTextureData{ Vec3(+w2, -h2, -d2), Vec2(1.0f, 1.0f) };
	// 뒷면
	vtx[4] = VertexTextureData{ Vec3(-w2, -h2, +d2), Vec2(1.0f, 1.0f) };
	vtx[5] = VertexTextureData{ Vec3(+w2, -h2, +d2), Vec2(0.0f, 1.0f) };
	vtx[6] = VertexTextureData{ Vec3(+w2, +h2, +d2), Vec2(0.0f, 0.0f) };
	vtx[7] = VertexTextureData{ Vec3(-w2, +h2, +d2), Vec2(1.0f, 0.0f) };
	// 윗면
	vtx[8] = VertexTextureData{ Vec3(-w2, +h2, -d2), Vec2(0.0f, 1.0f) };
	vtx[9] = VertexTextureData{ Vec3(-w2, +h2, +d2), Vec2(0.0f, 0.0f) };
	vtx[10] = VertexTextureData{ Vec3(+w2, +h2, +d2), Vec2(1.0f, 0.0f) };
	vtx[11] = VertexTextureData{ Vec3(+w2, +h2, -d2), Vec2(1.0f, 1.0f) };
	// 아랫면
	vtx[12] = VertexTextureData{ Vec3(-w2, -h2, -d2), Vec2(1.0f, 1.0f) };
	vtx[13] = VertexTextureData{ Vec3(+w2, -h2, -d2), Vec2(0.0f, 1.0f) };
	vtx[14] = VertexTextureData{ Vec3(+w2, -h2, +d2), Vec2(0.0f, 0.0f) };
	vtx[15] = VertexTextureData{ Vec3(-w2, -h2, +d2), Vec2(1.0f, 0.0f) };
	// 왼쪽면
	vtx[16] = VertexTextureData{ Vec3(-w2, -h2, +d2), Vec2(0.0f, 1.0f) };
	vtx[17] = VertexTextureData{ Vec3(-w2, +h2, +d2), Vec2(0.0f, 0.0f) };
	vtx[18] = VertexTextureData{ Vec3(-w2, +h2, -d2), Vec2(1.0f, 0.0f) };
	vtx[19] = VertexTextureData{ Vec3(-w2, -h2, -d2), Vec2(1.0f, 1.0f) };
	// 오른쪽면
	vtx[20] = VertexTextureData{ Vec3(+w2, -h2, -d2), Vec2(0.0f, 1.0f) };
	vtx[21] = VertexTextureData{ Vec3(+w2, +h2, -d2), Vec2(0.0f, 0.0f) };
	vtx[22] = VertexTextureData{ Vec3(+w2, +h2, +d2), Vec2(1.0f, 0.0f) };
	vtx[23] = VertexTextureData{ Vec3(+w2, -h2, +d2), Vec2(1.0f, 1.0f) };

	geometry->SetVertices(vtx);

	vector<uint32> idx(36);

	// 앞면
	idx[0] = 0; idx[1] = 1; idx[2] = 2;
	idx[3] = 0; idx[4] = 2; idx[5] = 3;
	// 뒷면
	idx[6] = 4; idx[7] = 5; idx[8] = 6;
	idx[9] = 4; idx[10] = 6; idx[11] = 7;
	// 윗면
	idx[12] = 8; idx[13] = 9; idx[14] = 10;
	idx[15] = 8; idx[16] = 10; idx[17] = 11;
	// 아랫면
	idx[18] = 12; idx[19] = 13; idx[20] = 14;
	idx[21] = 12; idx[22] = 14; idx[23] = 15;
	// 왼쪽면
	idx[24] = 16; idx[25] = 17; idx[26] = 18;
	idx[27] = 16; idx[28] = 18; idx[29] = 19;
	// 오른쪽면
	idx[30] = 20; idx[31] = 21; idx[32] = 22;
	idx[33] = 20; idx[34] = 22; idx[35] = 23;

	geometry->SetIndices(idx);
}
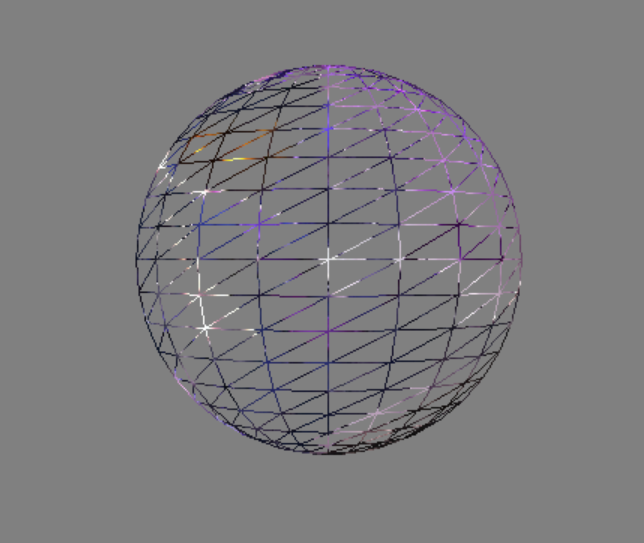
Sphere는 어떻게 만들 수 있을까? 구체의 끝을 지정한다. 지구를 기준했을 때, 북극 남극과 같은 위치를 지정하고 북극부터 남극까지 가로로 슬라이스 해서 몇번 자를 것인지 정하는 것이다. 사진은 3번 자른 것이다. 물론 훨씬 더 잘라야 하지만 이해를 돕기 위해 3번만 했다.
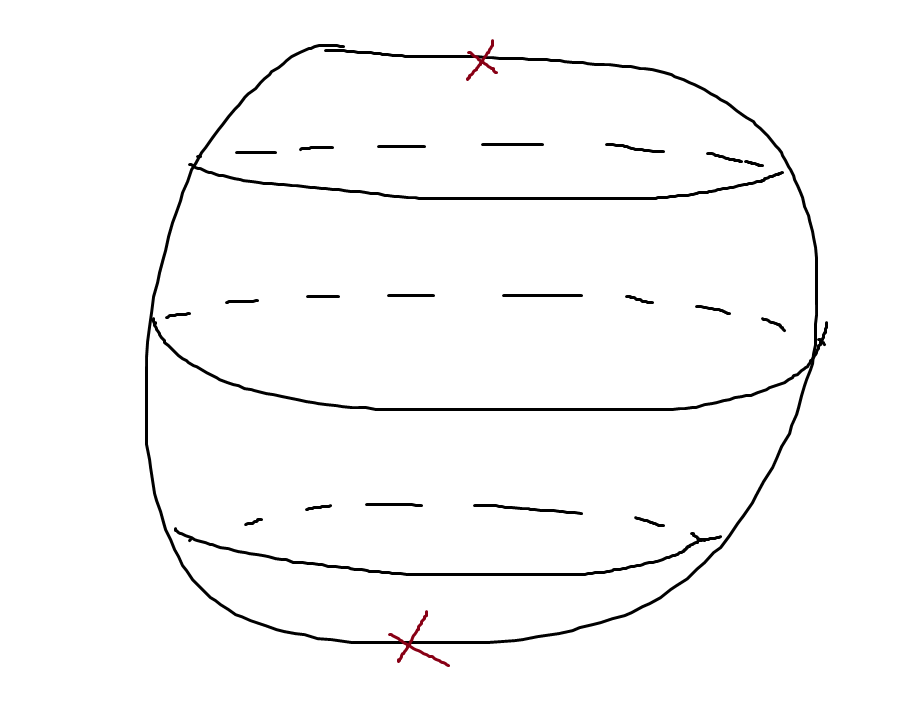
여기서 이제 각 단면이 몇개의 삼각형으로 이루어져있는지를 정해야한다.

이렇게 피자 모양처럼 자르게 된 후 초록색 점을 정점으로 기억해서 모양을 나타내는 것이다.
void GeometryHelper::CreateSphere(shared_ptr<Geometry<VertexTextureData>> geometry)
{
	float radius = 0.5f; // 구의 반지름
	uint32 stackCount = 20; // 가로 분할
	uint32 sliceCount = 20; // 세로 분할

	vector<VertexTextureData> vtx;

	VertexTextureData v;

	// 북극
	v.position = Vec3(0.0f, radius, 0.0f);
	v.uv = Vec2(0.5f, 0.0f);
	vtx.push_back(v);

	float stackAngle = XM_PI / stackCount;
	float sliceAngle = XM_2PI / sliceCount;

	float deltaU = 1.f / static_cast<float>(sliceCount);
	float deltaV = 1.f / static_cast<float>(stackCount);

	// 고리마다 돌면서 정점을 계산한다 (북극/남극 단일점은 고리가 X)
	for (uint32 y = 1; y <= stackCount - 1; ++y)
	{
		float phi = y * stackAngle;

		// 고리에 위치한 정점
		for (uint32 x = 0; x <= sliceCount; ++x)
		{
			float theta = x * sliceAngle;

			v.position.x = radius * sinf(phi) * cosf(theta);
			v.position.y = radius * cosf(phi);
			v.position.z = radius * sinf(phi) * sinf(theta);

			v.uv = Vec2(deltaU * x, deltaV * y);

			vtx.push_back(v);
		}
	}

	// 남극
	v.position = Vec3(0.0f, -radius, 0.0f);
	v.uv = Vec2(0.5f, 1.0f);
	vtx.push_back(v);

	geometry->SetVertices(vtx);

	vector<uint32> idx(36);

	// 북극 인덱스
	for (uint32 i = 0; i <= sliceCount; ++i)
	{
		//  [0]
		//   |  \
		//  [i+1]-[i+2]
		idx.push_back(0);
		idx.push_back(i + 2);
		idx.push_back(i + 1);
	}

	// 몸통 인덱스
	uint32 ringVertexCount = sliceCount + 1;
	for (uint32 y = 0; y < stackCount - 2; ++y)
	{
		for (uint32 x = 0; x < sliceCount; ++x)
		{
			//  [y, x]-[y, x+1]
			//  |		/
			//  [y+1, x]
			idx.push_back(1 + (y)*ringVertexCount + (x));
			idx.push_back(1 + (y)*ringVertexCount + (x + 1));
			idx.push_back(1 + (y + 1) * ringVertexCount + (x));
			//		 [y, x+1]
			//		 /	  |
			//  [y+1, x]-[y+1, x+1]
			idx.push_back(1 + (y + 1) * ringVertexCount + (x));
			idx.push_back(1 + (y)*ringVertexCount + (x + 1));
			idx.push_back(1 + (y + 1) * ringVertexCount + (x + 1));
		}
	}

	// 남극 인덱스
	uint32 bottomIndex = static_cast<uint32>(vtx.size()) - 1;
	uint32 lastRingStartIndex = bottomIndex - ringVertexCount;
	for (uint32 i = 0; i < sliceCount; ++i)
	{
		//  [last+i]-[last+i+1]
		//  |      /
		//  [bottom]
		idx.push_back(bottomIndex);
		idx.push_back(lastRingStartIndex + i);
		idx.push_back(lastRingStartIndex + i + 1);
	}

	geometry->SetIndices(idx);
}
Grid는 우리가 바닥을 만들때 자주 사용한다. 지형같은 것을 만들 때 매우 유용하다. 단순히 사각형에 수많은 가로 세로 라인 이 있는 것이고 그것마다 정점 정보를 저장하면 된다. 나중에 그 정점의 높이를 높여주면 그게 결국 지형에서 산이 되는 것이다.
void GeometryHelper::CreateGrid(shared_ptr<Geometry<VertexTextureData>> geometry, int32 sizeX, int32 sizeZ)
{
	vector<VertexTextureData> vtx;

	for (int32 z = 0; z < sizeZ + 1; z++)
	{
		for (int32 x = 0; x < sizeX + 1; x++)
		{
			VertexTextureData v;
			v.position = Vec3(static_cast<float>(x), 0, static_cast<float>(z));
			v.uv = Vec2(static_cast<float>(x), static_cast<float>(sizeZ - z));
			//v.normal = Vec3(0.f, 1.f, 0.f);

			vtx.push_back(v);
		}
	}

	geometry->SetVertices(vtx);

	vector<uint32> idx;

	for (int32 z = 0; z < sizeZ; z++)
	{
		for (int32 x = 0; x < sizeX; x++)
		{
			//  [0]
			//   |	\
			//  [2] - [1]
			idx.push_back((sizeX + 1) * (z + 1) + (x));
			idx.push_back((sizeX + 1) * (z)+(x + 1));
			idx.push_back((sizeX + 1) * (z)+(x));
			//  [1] - [2]
			//   	\  |
			//		  [0]
			idx.push_back((sizeX + 1) * (z)+(x + 1));
			idx.push_back((sizeX + 1) * (z + 1) + (x));
			idx.push_back((sizeX + 1) * (z + 1) + (x + 1));
		}
	}

	geometry->SetIndices(idx);
}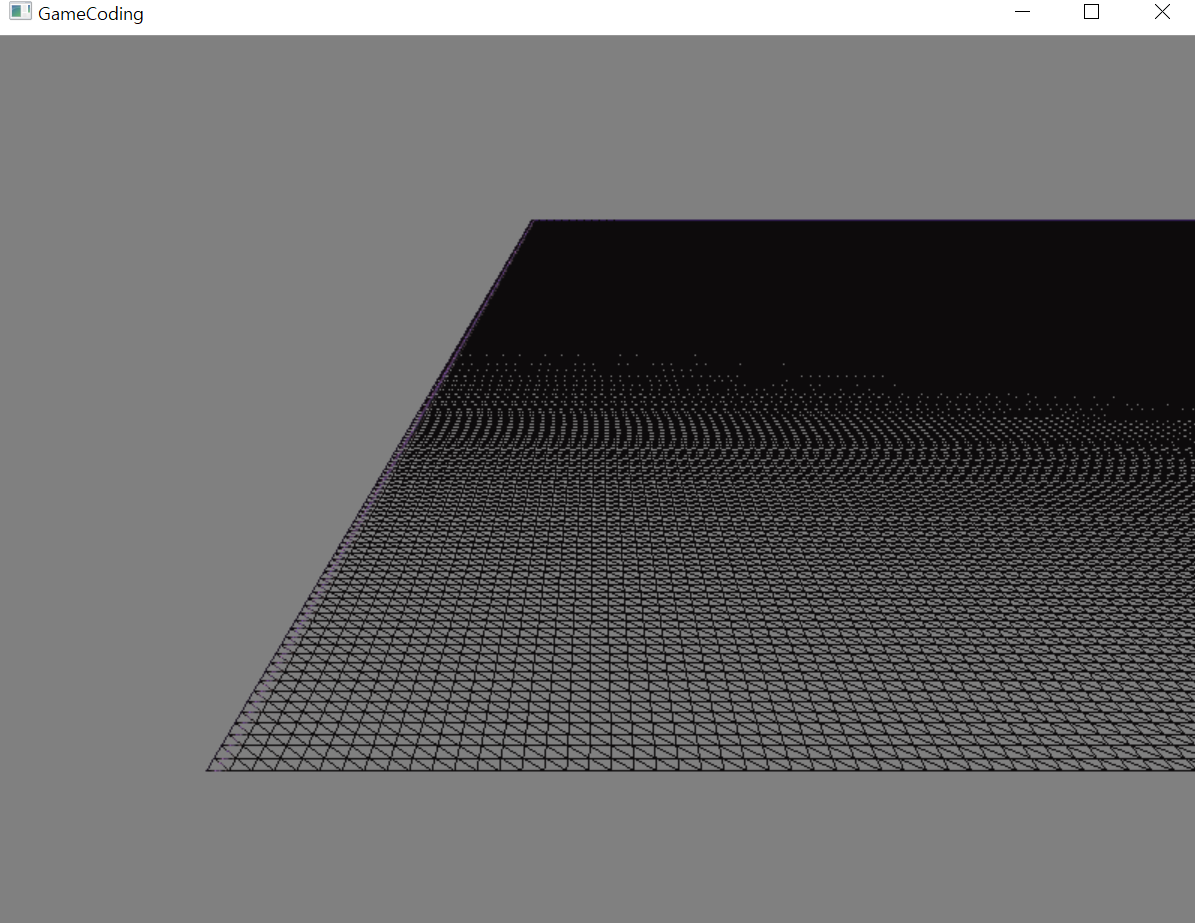
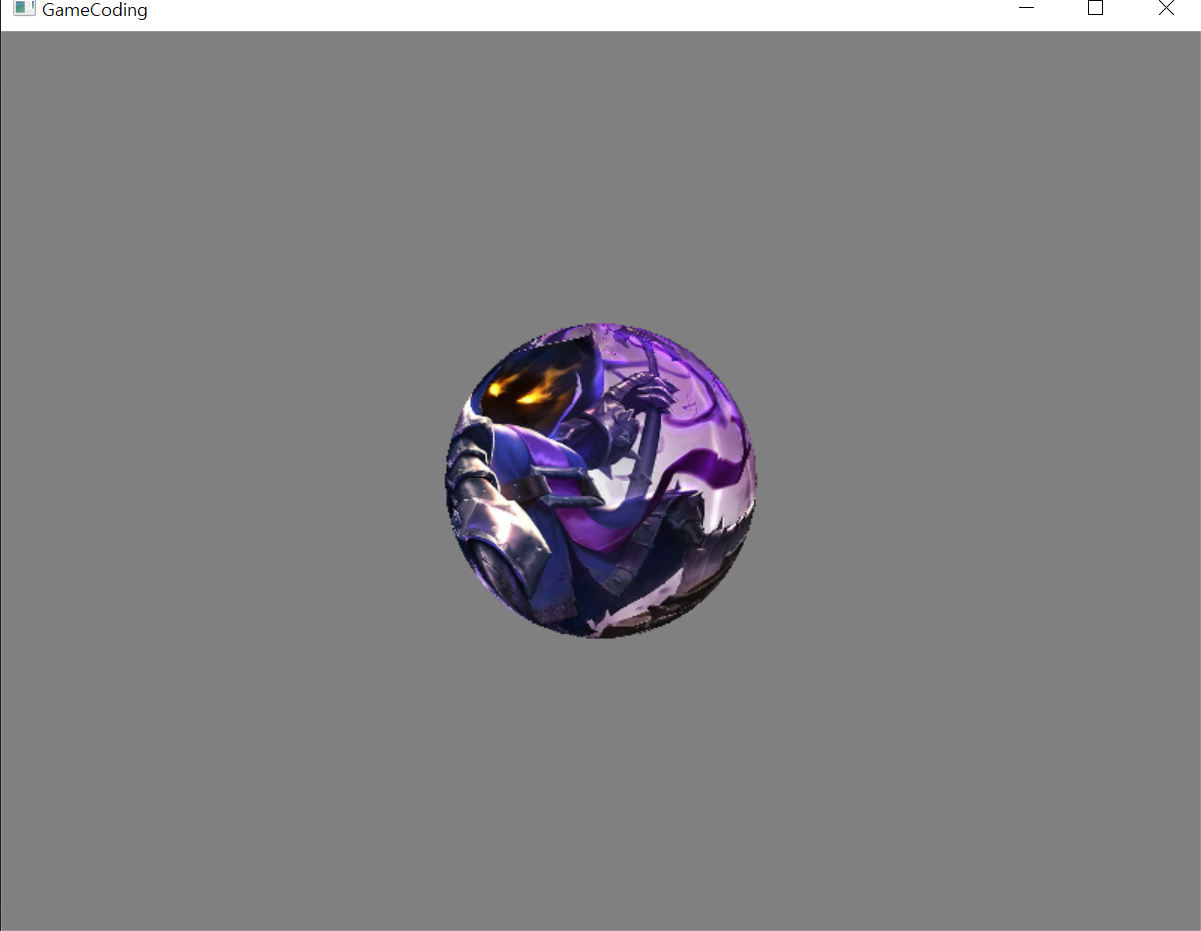
하지만 제대로 뜨지 않을 것이다. 이는 샘플링에 대해 알아보자.
Sampler
uv 좌표는 공식적으로 0 ~ 1이다. 그렇다면 만약 우리가 설정한 uv 값이 범위를 벗어나는 경우는 어떻게 할 것인가에 대한 처리를 Sampler가 한다고 볼 수 있다.
Sampler에서 대표적으로 두가지가 있는데
Filter = 확대 / 축소 일어났을 때 중간 부분을 처리하는 방식 설정
Address = UV가 1보다 컸을 때, 나머지 부분 처리하는 방식 설정
우리는 Address가 중요하다. 쉐이더를 이렇게 설정해서 PS 단계에서 어떻게 적용할지 선택할 수 있다.
SamplerState SamplerAddressWrap
{
    AddressU = Wrap;
    AddressV = Wrap;
};

SamplerState SamplerAddressMirror
{
    AddressU = Mirror;
    AddressV = Mirror;
};

SamplerState SamplerAddressClamp
{
    AddressU = Clamp;
    AddressV = Clamp;
};

SamplerState SamplerAddressBorader
{
    AddressU = Borader;
    AddressV = Borader;
    BorderColor = float(1, 0, 0, 1);
};

float4 PS(VertexOutput input) : SV_TARGET
{
    if(Address == 0)
        return Texture0.Sample(SamplerAddressWrap, input.uv);
    if (Address == 1)
        return Texture0.Sample(SamplerAddressMirror, input.uv);
    if (Address == 2)
        return Texture0.Sample(SamplerAddressClamp, input.uv);
    if (Address == 3)
        return Texture0.Sample(SamplerAddressBorader, input.uv);

    return Texture0.Sample(Sampler0, input.uv);
}'C++ > DirectX 11' 카테고리의 다른 글
| [DirectX] Lighting & Material - Global Shader, Depth Stencil View, 조명 (0) | 2024.09.24 |
|---|---|
| [DirectX] DirectX 11 3D 입문 - Height Map, Normal, Mesh (0) | 2024.09.13 |
| [DirectX] DirectX 11 3D 입문 - 프로젝트 설정 및 간단한 실습 (0) | 2024.09.11 |
| [DirectX] 엔진 구조로 제작하기 - Material, Animation, Data (1) | 2024.09.10 |
| [DirectX] 엔진 구조로 제작하기 - Managers (1) | 2024.09.06 |
